Conductive flooring
 Audio for slide 1 (mp3 |6|KB)
As we discussed earlier (in 'Static electricity in floors'), conductive floors have a low electrical resistance.
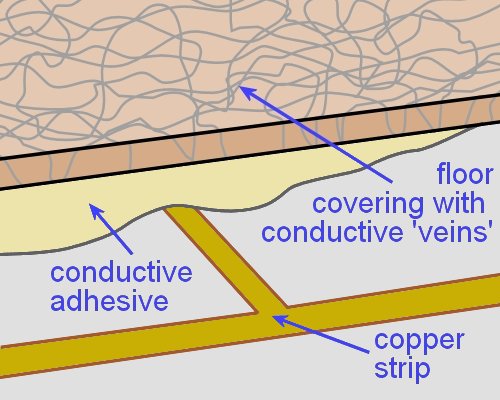
This is achieved through adding thousands of tiny conductive fibres or 'veins' into the tile or sheet product.
Depending on the brand of flooring, these conductive fibres or chips could be made of carbon, graphite, metal, or a combination of materials.
The structure of the resilient product is homogeneous, to ensure that the fibres are evenly distributed throughout.

 Audio for slide 3 (mp3 |6|KB)
Here is the general procedure.
- Apply a primer to the floor with a brush or roller. Depending on the manufacturer and the size of the floor area, you may need to use a conductive primer.
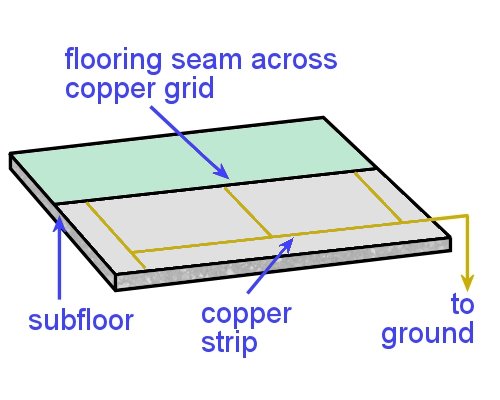
- Stick down the copper strip in the grid pattern specified by the manufacturer, and run it across to the earthing point on the wall.
- Use a conductive adhesive to stick down the flooring, and roll the floor with an appropriate sized roller.
- Check the electrical conductivity, and organise for a licensed electrician to earth the connection.

Go to Assignment

Industry Network Training and Assessment Resourses
© 2023 Workspace Training


