close
Skip to content

Competencies covered

MSFFL3013: Install commercial vinyl floor coverings

MSFFL3014: Install resilient floor coverings using custom designs and decorative finishes

Heat welding problems
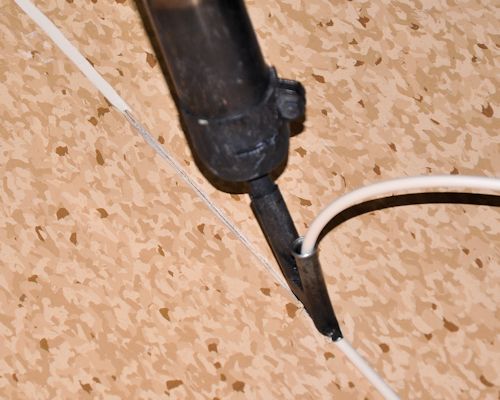

Image for slide 1
Audio for slide 1 (mp3 |6|KB)

There are lots of reasons why welds fail. Sometimes it is due to problems in the materials or subfloor. Other times it's simply due to a lack of skill or knowledge in the process.

However, heat welding is like most other skills, in that the more you practise the better you'll get.

Below are some of the common problems that can occur with welds. They are summarised from an article on the Floor Trends website called 'Why did the heat melt fail?' To access the full article, go to the website at the link below, and register your name. Note that registration is free.

Why did the heat melt fail?

hearing icon
Image for slide 2
Audio for slide 2 (mp3 |6|KB)

Common problems

Substrate and adhesive

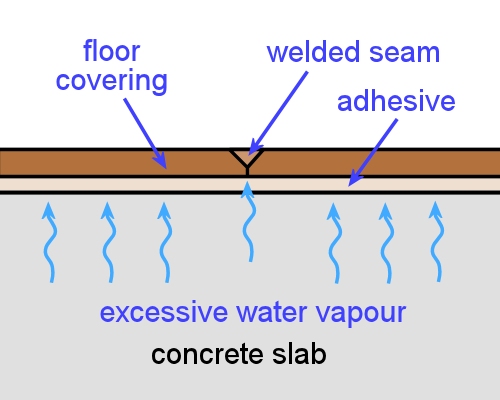
Excessive moisture in the slab

Water vapour in the seam can affect the heat fusion process and reduce its bonding strength.

Wet adhesive

For most adhesives, you need to wait until the following day before you start to weld the seams.

hearing icon
Image for slide 3
Audio for slide 3 (mp3 |6|KB)

Groove

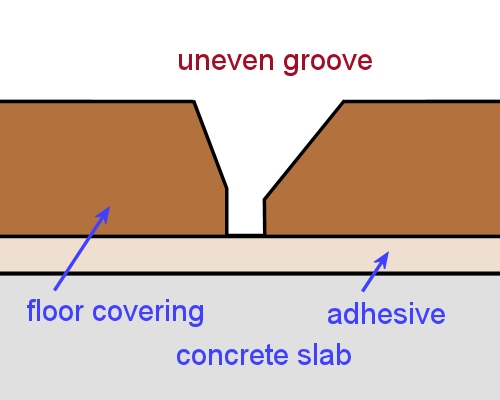
Uneven groove

If the edges of a seam aren't even, or the groove isn't centred properly, there won't be a consistent V-shaped depth to the groove.

This will affect the strength of the weld.

hearing icon
Image for slide 4
Audio for slide 4 (mp3 |6|KB)
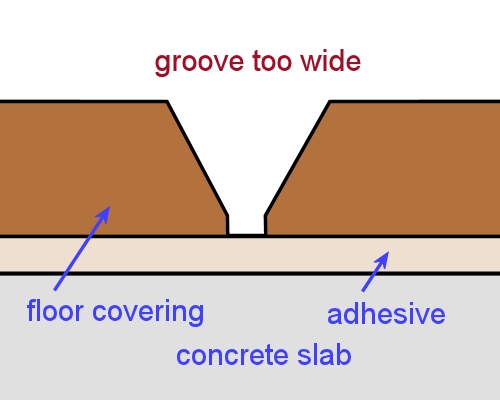
Groove too wide

The width of the groove needs to be correct for the diameter of welding cable being used, otherwise the quantity of cable won't match the gap being filled.

hearing icon
Image for slide 5
Audio for slide 5 (mp3 |6|KB)
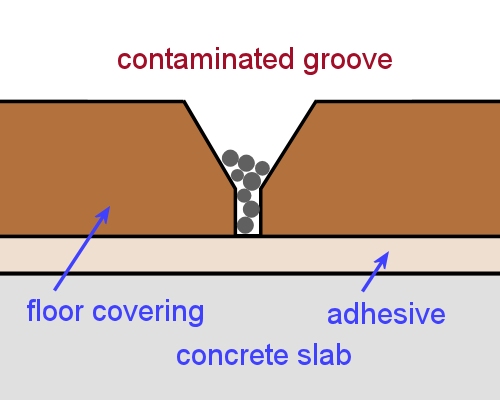
Contaminated groove

If you allow dust or other contaminants to fall into the groove, the weld won't bond properly.

Don't groove the whole area before you start welding - only groove the seam you are about to weld.

hearing icon
Image for slide 6
Audio for slide 6 (mp3 |6|KB)

Welding gun

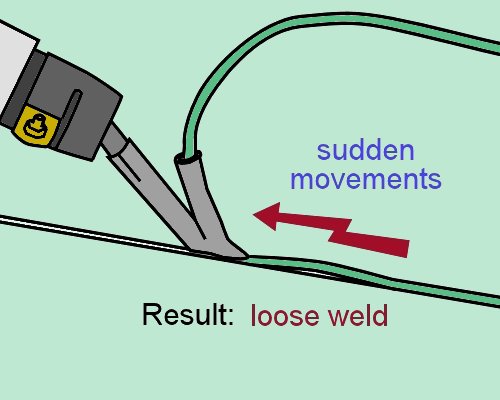
Sudden movements

If you reposition your body and make the weld tip jump while you're welding, it can result in a loose section of welded material.

hearing icon
Image for slide 7
Audio for slide 7 (mp3 |6|KB)
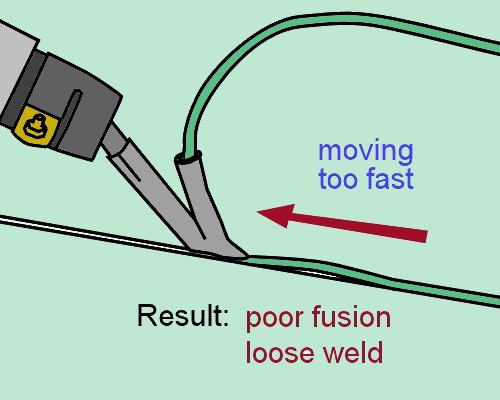
Moving too fast

The gun needs to be pulled along the groove at just the right speed for the temperature setting and material being welded.

If it's too fast there won't be enough time for the fusion to take place.

hearing icon
Image for slide 8
Audio for slide 8 (mp3 |6|KB)
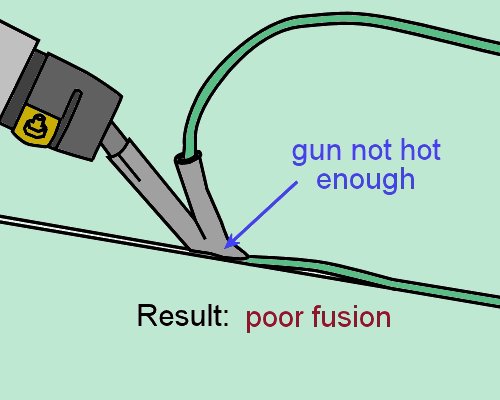
Gun not hot enough

It takes time for the gun to warm up, so you must wait until it reaches its operating temperature.

Low heat will result in poor fusion.

hearing icon
Image for slide 9
Audio for slide 9 (mp3 |6|KB)
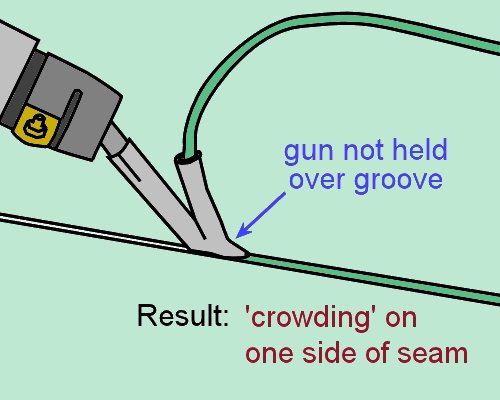
Gun not held over the groove

If you hold the gun at an angle you'll 'crowd' one side of the seam.

Make sure you keep the gun upright with an even pressure on the tip.

hearing icon
Image for slide 10
Audio for slide 10 (mp3 |6|KB)
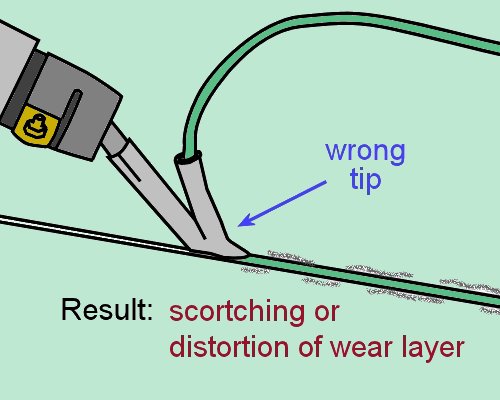
Wrong tip

The tip must be the correct type and size for the cable and product being welded.

If there is too much 'hot air wash' because the wrong tip is being used, you might scorch or distort the coating on the wear surface.

hearing icon
Image for slide 11
Audio for slide 11 (mp3 |6|KB)
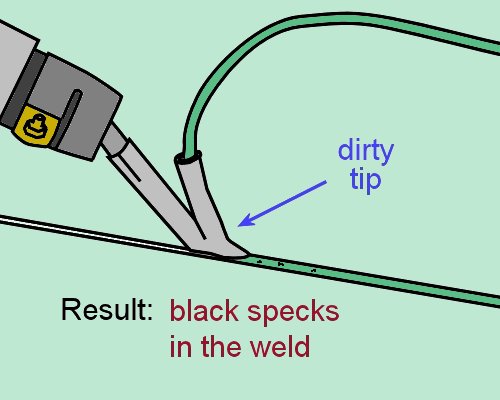
Dirty tip

The tip must be cleaned after every weld, as residue can burn inside it and become embedded as black specks in the next weld.

hearing icon
Image for slide 12
Audio for slide 12 (mp3 |6|KB)

Trimming

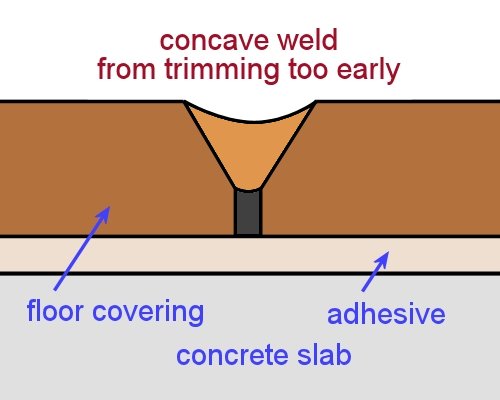
Trimming too early or too late

The timing of the first trimming pass is determined by the material you're welding.

With commercial vinyl you should do the first pass while the weld is still warm, and then let it cool completely before doing the second pass.

If you're too quick with the second pass, you might end up with a severely concaved weld.

hearing icon


Learning activity

Audio 13 (mp3 |6|KB)

Have you experienced any of these problems in your own welds or seen them in other people's work?

Describe the appearance of the weld and state what you think might have caused the problem.

hearing icon