Stretching carpet
 Audio for slide 1 (mp3 |6|KB)
The overall objective in stretching carpet is to make sure that it remains flat and wrinkle free during the course of its lifetime, and is not affected by changes in humidity.
Tufted carpet needs to be stretched between about 1% to 1½% in both directions.
For example, if the length of the carpet is 8 metres, the stretch should be between 80 to 120 mm.

 Audio for slide 2 (mp3 |6|KB)
Some carpets will stretch more easily than others.
Woven synthetic secondary backings will be easier to stretch than jute secondary backings.
Many installers use the rule of thumb that jute should simply be stretched 'drum tight'.
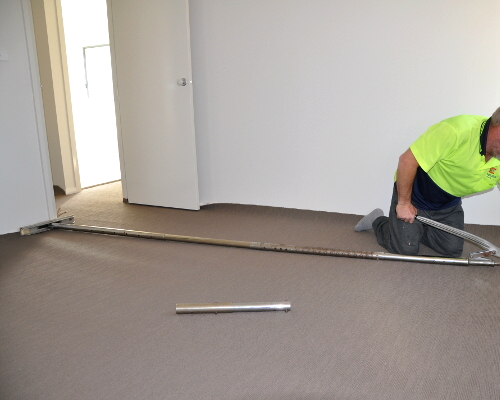
Below is the process used to stretch carpet using a power stretcher.
Note that you should not use a knee kicker to stretch carpet, because it won't provide a uniform tension across the full width of the floor.

 Audio for slide 3 (mp3 |6|KB)
Using a power stretcher
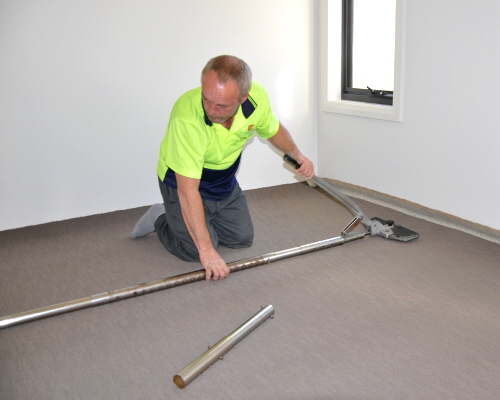
- Place the power stretcher on the carpet, with the head near the wall you are stretching to and the foot near the opposite wall.
- Hook the carpet onto the gripper at the foot end, making sure you leave room either side of the seam for the seaming iron.
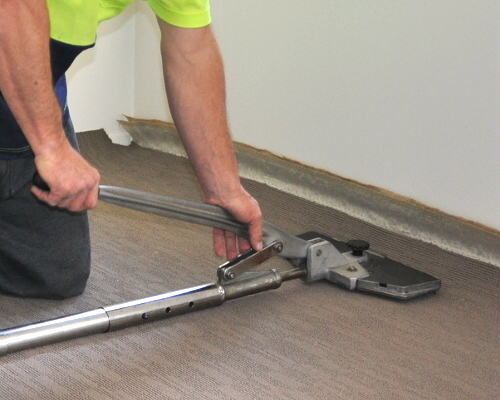
- Set up the power stretcher by putting the head about 150 mm from the wall you are stretching to, and the foot hard against the opposite wall.
- Position the handle at about 45 degrees, and stretch the carpet by pushing down on the handle.
You can mark the amount of stretch you're looking for with a piece of chalk on the skirting or wall.
It may take several stretches to achieve the 1 to 1½% total stretch required.

 Audio for slide 4 (mp3 |6|KB)
Australian Standards recommendations
AS/NZS 2455 says that tufted carpet should be two-way stretched using a power stretcher.
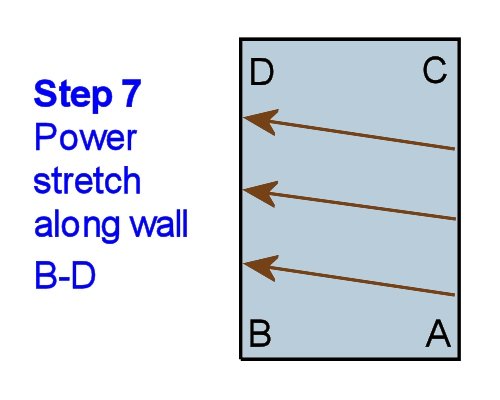
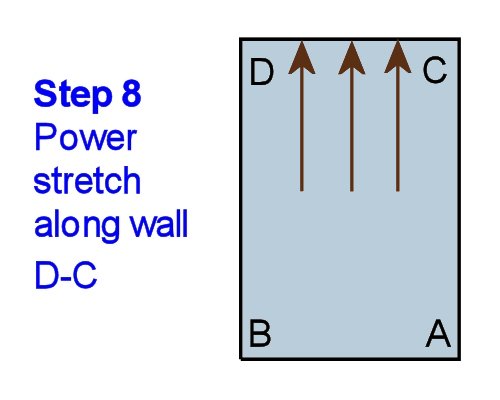
The diagrams below are taken from Appendix C.
They show eight steps for stretching tufted carpet.
Let's have a closer look at each step, and also discuss the extra installation procedures you should follow as you undertake each step.

 Audio for slide 6 (mp3 |6|KB)
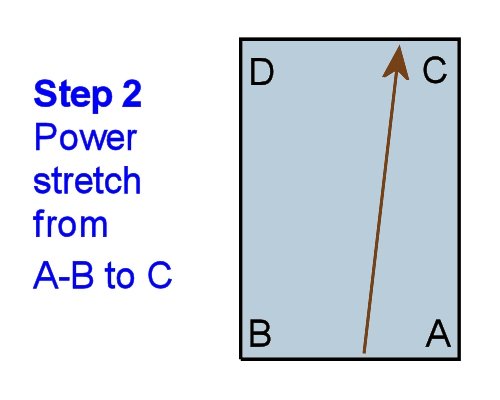
Step 2. Power stretch from A-B to C
Use the power stretcher to stretch the carpet the full length of the room from wall A-B towards corner C.
Run the power stretcher at a 15 degree angle, towards corner C.
Put a notch cut at corner C and hook the carpet onto the gripper for about 500 mm to secure it.

 Audio for slide 8 (mp3 |6|KB)
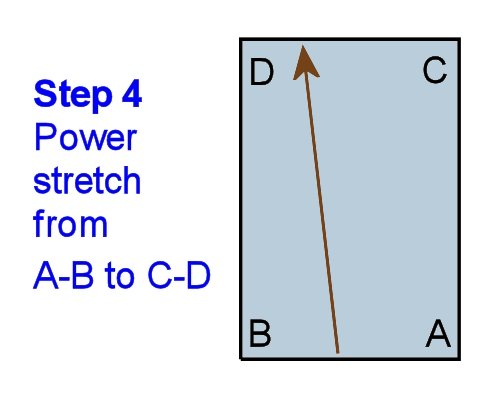
Step 4. Power stretch from A-B to C-D
Use the power stretcher to stretch across the room from A-B to C-D.
Hook the carpet onto the gripper along C-D, starting at corner C.
Angle the power stretcher towards corner D, at about 15 degrees.
Move along the wall at intervals the same width as the width of the stretch head.


