Laying the underlay
 Audio for slide 1 (mp3 |6|KB)
All manufacturers provide installation instructions for their underlay products.
Sometimes these are included in the packaging, but they're always available on the manufacturer's website.
Below are the general recommendations that apply to laying and fixing hard underlays.
If any of these differ from those specified for the particular product you're installing, make sure you follow the manufacturer's own instructions.

 Audio for slide 5 (mp3 |6|KB)
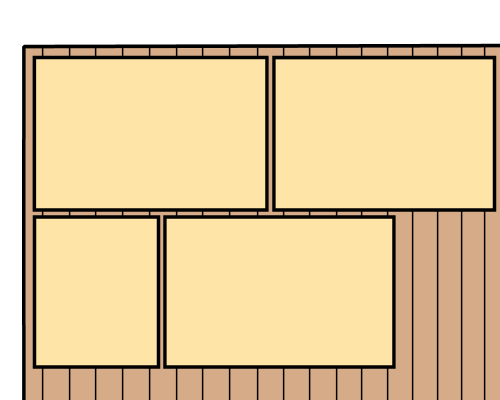
Wood-based underlays fixed to strip timber subfloors
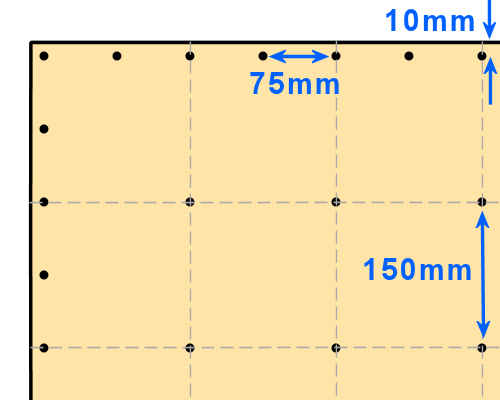
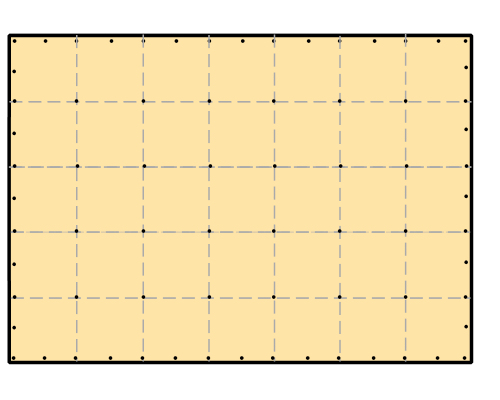
Place the fasteners 10 mm in from the perimeter of the sheet and every 75 mm around the perimeter.
Also place fasteners at 150 mm spacings throughout the body of the sheet.
Use 22 mm resin coated staples or 25 mm underlay nails, finished with the heads slightly below the sheet surface.
Lightly sand the joints and fixing points with a flat based sanding machine to achieve a flush finish.

 Audio for slide 6 (mp3 |6|KB)
Wood-based underlays fixed to plywood or particleboard subfloors
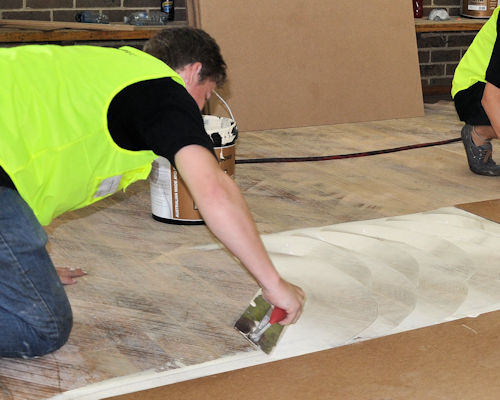
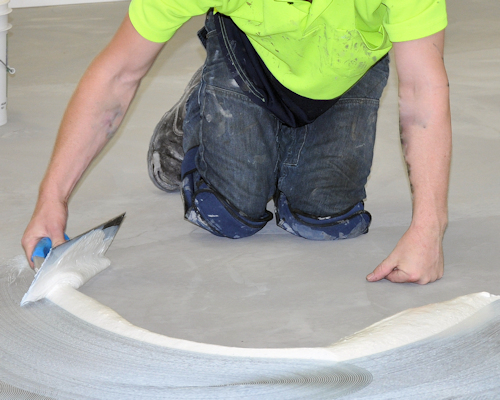
Apply a flexible polyurethane adhesive (such as 'Maxbond') to the substrate before laying the underlay sheet on top.
Use a grid pattern (spaced in 150 mm squares) if applied from a gun, or alternatively spread the adhesive with a V1 notched trowel (with a 1.6 mm V profile).
Then follow all other steps specified above for strip timber subfloors.

 Audio for slide 7 (mp3 |6|KB)
Wood-based underlays fixed to concrete
Spread a flexible polyurethane adhesive on the concrete substrate using a V3 trowel.
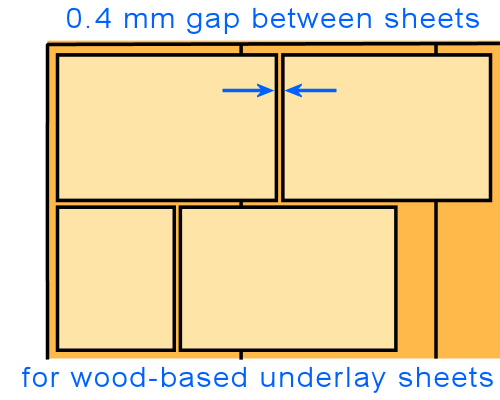
Place the underlay into the adhesive, leaving a 0.4 mm gap between sheets to allow for expansion.
Then roll the underlay with a 40 kg roller and allow the adhesive to cure.
Lightly sand the joints and fixing points with a flat based sanding machine to achieve a flush finish.
Flooring installers often use concrete pins or nails in addition to adhesive when fixing hardboard direct to concrete, especially when levelling compounds have been applied.

 Audio for slide 8 (mp3 |6|KB)
Fibre cement underlays fixed to wooden subfloors
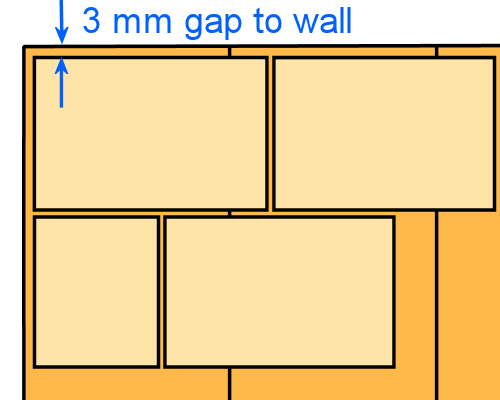
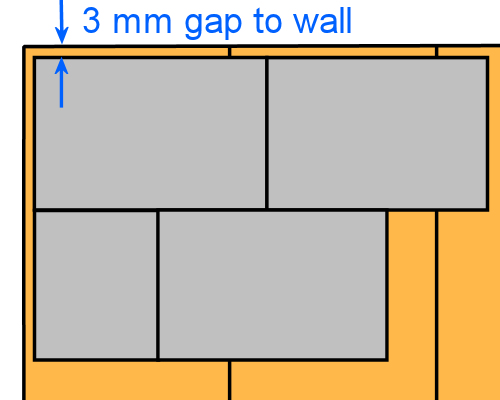
Lay the sheets in position on the subfloor, hard against each other but with a 3 mm gap around the perimeter.
Note that if the floor surface will be tiled, you should put in a 'movement joint' wherever there is a transition from one subfloor surface to another.
Movement joints should also be provided where there are changes of direction.
If fixing to a softwood floor or sheet flooring product, spread a stud adhesive on the back of the underlay sheet with a 3mm notched trowel before putting it in position.
There is no need to take this step if you're fixing to a hardwood floor.

 Audio for slide 9 (mp3 |6|KB)
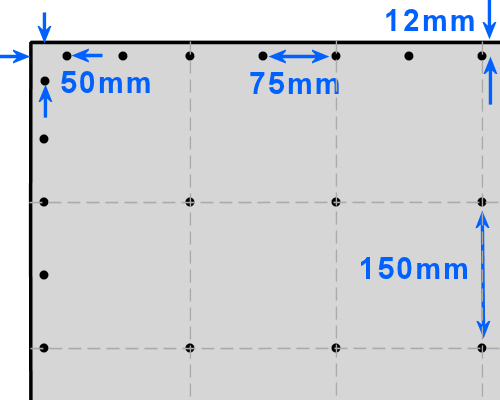
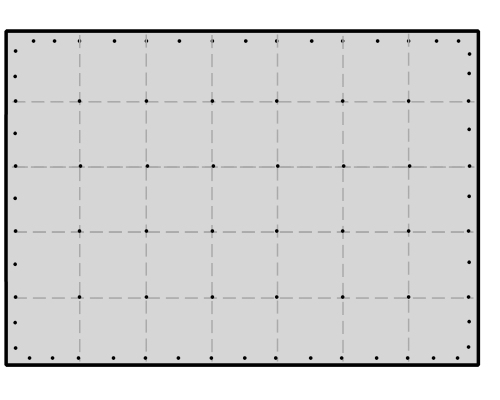
The spacings for fasteners are similar to those for wood-based underlays.
However, since fibre cement is more brittle, the fasteners should be placed 12 mm in from the edges, and 50 mm back from the corners.
The spacings throughout the body of the sheet are the same as for hardboard - 150 mm in both directions.

 Audio for slide 10 (mp3 |6|KB)
If you're hand nailing the sheets, use 25 x 2.5 mm underlay nails, with the heads finishing flush with the sheet surface.
For nail guns, use 27 mm nails, and for staple guns, use 22 mm staples.
Fill minor height variations with a feather finish patching and smoothing compound.
Then flush sand joints and fixing points with a belt or rotary sander (fitted with an approved dust collection system).
Remember that fibre cement underlay is not recommended for use over a concrete subfloor.


