Marking working lines
 Audio for slide 1 (mp3 |6|KB)
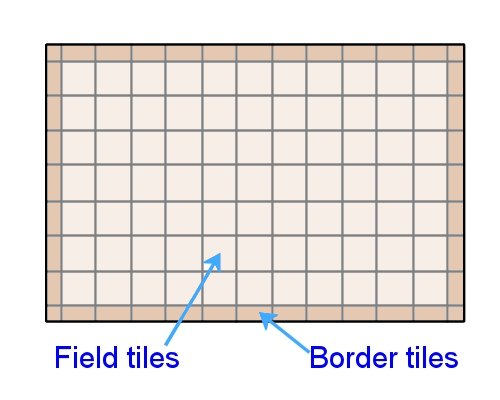
The border tiles - also called 'perimeter tiles' - are the ones that go around the perimeter of the room.
They enclose the field tiles that form the main body of the floor.

 Audio for slide 2 (mp3 |6|KB)
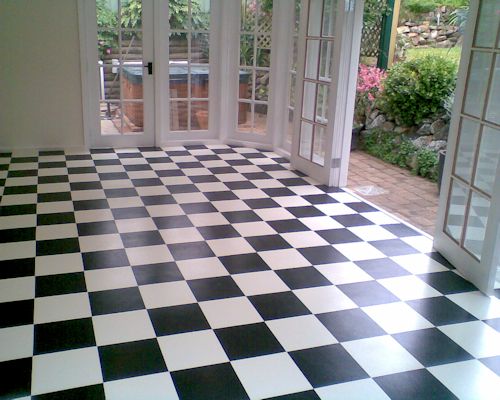
You also need to set out where the tiles will fall in relation to any architectural features in the room, such as columns, recesses or projections.
If you can avoid awkward cuts or small fill-in pieces, the job will be easier to do and the final result will look more professional.

 Audio for slide 3 (mp3 |6|KB)
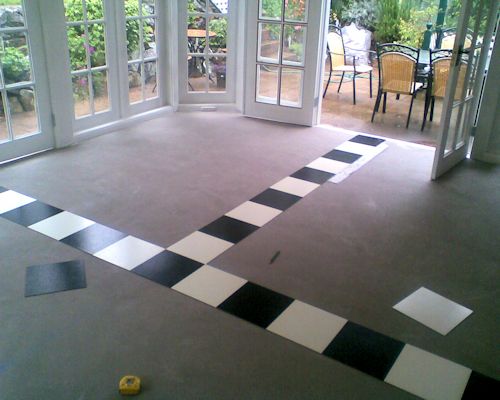
This is called 'dry laying', and it lets you see exactly how wide the border tiles will be against the walls.
Alternatively, you can mark the tile widths (or multiples of the widths) along the centrelines to see where the last full tile will finish.

 Audio for slide 4 (mp3 |6|KB)
Another option is to simply do the sums in your head or on a calculator. Below is an example.
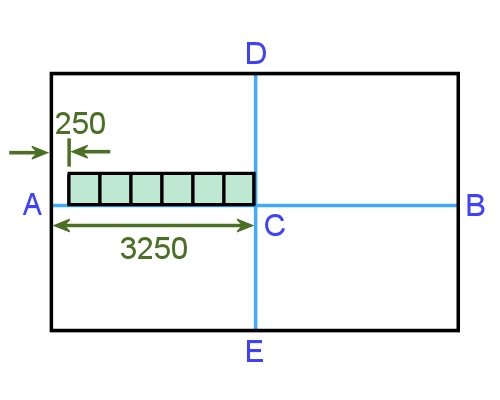
Say the tiles are 500 x 500 mm and the length of the line AC is 3250 mm.
The number of tiles along the line AC is:
3250 ÷ 500 = 6.5 (in other words, 6 ½) tiles
This means that the width of the last tile will be:
500 x 0.5 = 250 mm

 Audio for slide 5 (mp3 |6|KB)
Moving the starting point
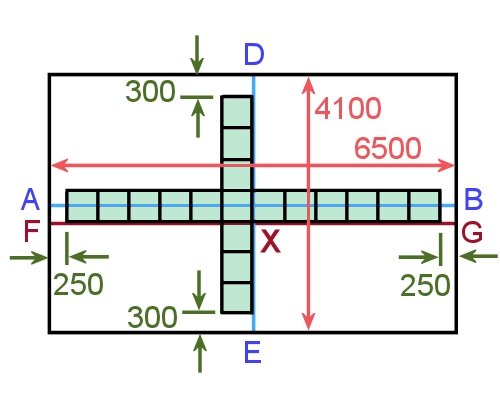
There are times when the last row of tiles might end up being a narrow strip. In these cases, you can move the starting point away from the true centre point so that you get a better result.
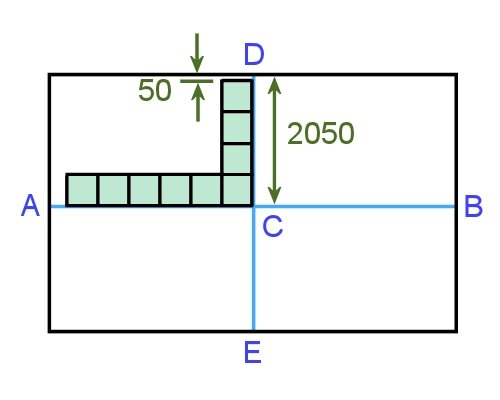
For example, let's say that the length of the line CD is 2050.
If you used the true centre point C as your starting point, the number of rows would be as shown below.
2050 ÷ 500 = 4.1
Therefore, the width of the last tile would be:
500 x 0.1 = 50 mm

 Audio for slide 6 (mp3 |6|KB)
The same will occur on the other side, because CE is the same length.
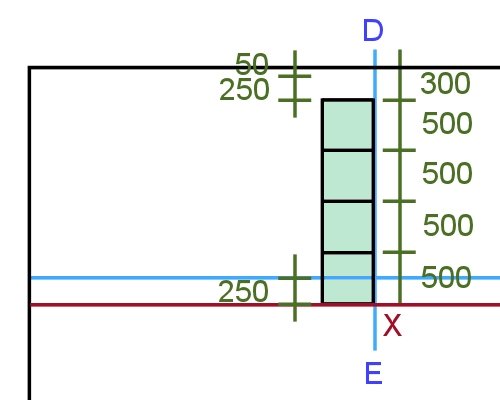
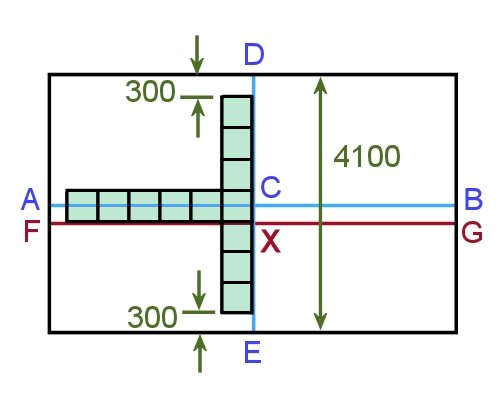
However, if you move the starting point towards E by 250 mm, you would end up with 4 full tiles plus a border tile cut to 300 mm.
50 + 250 (distance moved) = 300 mm
This means that the starting point will no longer be C - it will now be X.

 Audio for slide 7 (mp3 |6|KB)
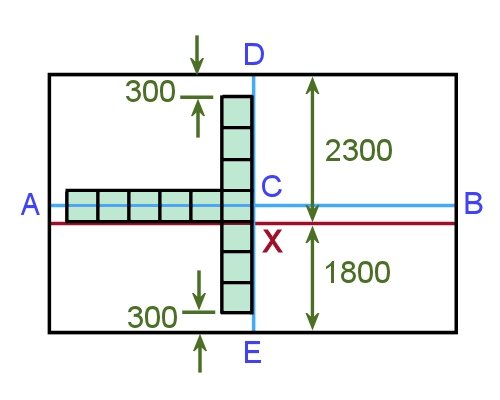
Note that since XD is longer than the original line by 250 mm, XE will be shorter by the same amount.
So the number of tiles along XE is 3.6, and the width of the border tile is 300 mm.
Here are the calculations.
XE = 2050 - 250 = 1800
Number of tiles along XE: 1800 ÷ 500 = 3.6
Width of the border tile: 500 x 0.6 = 300 mm

 Audio for slide 8 (mp3 |6|KB)
The border tiles on both sides are still the same width, but we've managed to avoid a narrow strip against the walls.
You can prove to yourself that the total length of the tiles across the room are unchanged by doing the following sums.
Total number of tiles along centreline DE: 4100 ÷ 500 = 8.2 tiles
Number of tiles either side of C = 4.1 (along CD) + 4.1 (along CE)
= 8.2 tiles (made up of 8 full tiles + 2 border tiles cut to 50 mm each)
Number of tiles either side of X = 4.6 (along XD) + 3.6 (along XE)
= 8.2 tiles (made up of 7 full tiles + 2 border tiles cut to 300 mm each)


Learning activity
Audio 10 (mp3 |6|KB)Let's say you've been asked to install vinyl tiles with a border in the room you're in right now.
If the room you're in is an unusual shape, you may select a particular area of the room that is square.
Measure up the area, do the calculations, and draw up the plan in a diagram like the last one shown in this lesson.
Mark in the two working lines and show their lengths either side of the starting point. Also show the width of the cut piece at each perimeter. If it is too awkward to put all this information on the same drawing, use one drawing to show the full floor plan and a second drawing to show the border tile measurements.
You may base your calculations on 500 x 500 tiles, or choose another size if you prefer.


